The Graph 入門: はじめてのサブグラフ – Subgraph の自動生成
May 24, 2022このページで作成したサブグラフのソースコードは GitHub からダウンロードできます。
サブグラフをデプロイして Subgraph Studio でクエリを実行することは無料で誰でもできます。
なるべく簡単な方法を紹介しています。 GraphQL は知らなくてもこのページで作ったサブグラフを試すことはできます。(サンプルクエリつき)
サブグラフを作成するときは、デプロイ済みのスマートコントラクトからコードを自動生成することができます。
非常にシンプルなスマートコントラクトから自動生成されるコードを使って簡単なサブグラフを作ってみましょう。
必要なもの
- npm
- Metamask と アカウント
- Event スマートコントラクト
Metamask は Subgraph Studio を使うときに使いますが、ETH は不要(のはず)です。
Event スマートコントラクトは以下のページで作った非常にシンプルなスマートコントラクトです。 もし、サブグラフだけ作りたいときは、筆者の作ったスマートコントラクトを使って進められます。
Solidity 入門: 定義したイベントを発行してブロックチェーンに記録
サブグラフを自動生成するためにスマートコントラクトが以下の条件を満たす必要があります。 Event スマートコントラクトはこの条件を満たしています。
- Etherscan でコードを Verify していること
- スマートコントラクトが events を発行していること
graph-cli のインストール
以下のコマンドを実行して、システムに graph-cli をインストールします。
npm install -g @graphprotocol/graph-cli正しくインストールできれば、以下のように graph コマンドを実行できるようになります。
 % graph version
0.26.0
graph init
プロジェクト用のディレクトリを作り以下のコマンドを実行します。
graph initいくつかの質問があるので答えます。
- Protocol:
ethereum - Product for which to initialize:
subgraph-studio - Subgraph slug:
event001 - Directory to create the subgraph in:
event001 - Ethereum network:
rinkeby - Contract address:
0xc5BeE3DDcD7F58380Aa0CA3D01dA63a34a9C3c09
このコントラクトアドレスは筆者が Rinkeby にデプロイしたコントラクトです。 https://rinkeby.etherscan.io/address/0xc5BeE3DDcD7F58380Aa0CA3D01dA63a34a9C3c09
 % graph init
✔ Protocol · ethereum
✔ Product for which to initialize · subgraph-studio
✔ Subgraph slug · event001
✔ Directory to create the subgraph in · event001
✔ Ethereum network · rinkeby
✔ Contract address · 0xc5BeE3DDcD7F58380Aa0CA3D01dA63a34a9C3c09
✔ Fetching ABI from Etherscan
✔ Contract Name · Event
  Generate subgraph
  Write subgraph to directory
✔ Create subgraph scaffold
✔ Initialize subgraph repository
✔ Install dependencies with yarn
✔ Generate ABI and schema types with yarn codegen

Subgraph event001 created in event001

Next steps:

  1. Run `graph auth` to authenticate with your deploy key.

  2. Type `cd event001` to enter the subgraph.

  3. Run `yarn deploy` to deploy the subgraph.

Make sure to visit the documentation on https://thegraph.com/docs/ for further information.
graph init を実行したディレクトリに event001 というディレクトリができて、その中にいろんなファイルが作られます。
ブロック番号の指定
このまま 1 行も変えずにデプロイすることもできますが、時間短縮のために 1 箇所だけ変えましょう。
どのブロックからデータの取得を開始するかを指定します。
subgraph.yaml
dataSources -> source -> startBlock
- startBlock: 10028560
10028560 は Event コントラクトをデプロイしたときの Rinkeby のブロック番号です。
これを指定しないとコントラクトをデプロイする前のログまで分析してしまうので無駄に時間がかかります。
追加後の subgraph.yaml は以下のようになります。
subgraph.yaml
specVersion: 0.0.2
schema:
  file: ./schema.graphql
dataSources:
  - kind: ethereum
    name: Event
    network: rinkeby
    source:
      address: "0xc5BeE3DDcD7F58380Aa0CA3D01dA63a34a9C3c09"
      abi: Event
      startBlock: 10028560
    mapping:
      kind: ethereum/events
      apiVersion: 0.0.5
      language: wasm/assemblyscript
      entities:
        - AnotherLog
        - Log
      abis:
        - name: Event
          file: ./abis/Event.json
      eventHandlers:
        - event: AnotherLog()
          handler: handleAnotherLog
        - event: Log(indexed address,string)
          handler: handleLog
      file: ./src/mapping.ts
コードの自動生成&ビルド
ここから先の作業はサブディレクトリで行います。(subgraph.yaml があるディレクトリ)
cd event001コードを自動生成します。
graph codegen% graph codegen
Skip migration: Bump mapping apiVersion from 0.0.1 to 0.0.2
Skip migration: Bump mapping apiVersion from 0.0.2 to 0.0.3
Skip migration: Bump mapping apiVersion from 0.0.3 to 0.0.4
Skip migration: Bump mapping apiVersion from 0.0.4 to 0.0.5
Skip migration: Bump mapping specVersion from 0.0.1 to 0.0.2
✔ Apply migrations
✔ Load subgraph from subgraph.yaml
Load contract ABI from abis/Event.json
✔ Load contract ABIs
Generate types for contract ABI: Event (abis/Event.json)
Write types to generated/Event/Event.ts
✔ Generate types for contract ABIs
✔ Generate types for data source templates
✔ Load data source template ABIs
✔ Generate types for data source template ABIs
✔ Load GraphQL schema from schema.graphql
Write types to generated/schema.ts
✔ Generate types for GraphQL schema
Types generated successfully以下のコマンドを実行してサブグラフをビルドします。
graph build% graph build
Skip migration: Bump mapping apiVersion from 0.0.1 to 0.0.2
Skip migration: Bump mapping apiVersion from 0.0.2 to 0.0.3
Skip migration: Bump mapping apiVersion from 0.0.3 to 0.0.4
Skip migration: Bump mapping apiVersion from 0.0.4 to 0.0.5
Skip migration: Bump mapping specVersion from 0.0.1 to 0.0.2
✔ Apply migrations
✔ Load subgraph from subgraph.yaml
Compile data source: Event => build/Event/Event.wasm
✔ Compile subgraph
Copy schema file build/schema.graphql
Write subgraph file build/Event/abis/Event.json
Write subgraph manifest build/subgraph.yaml
✔ Write compiled subgraph to build/
Build completed: /Users/sakanosita/ghq/github.com/smacon-dev/subgraphs/event001/build/subgraph.yamlSubgraph のデプロイ
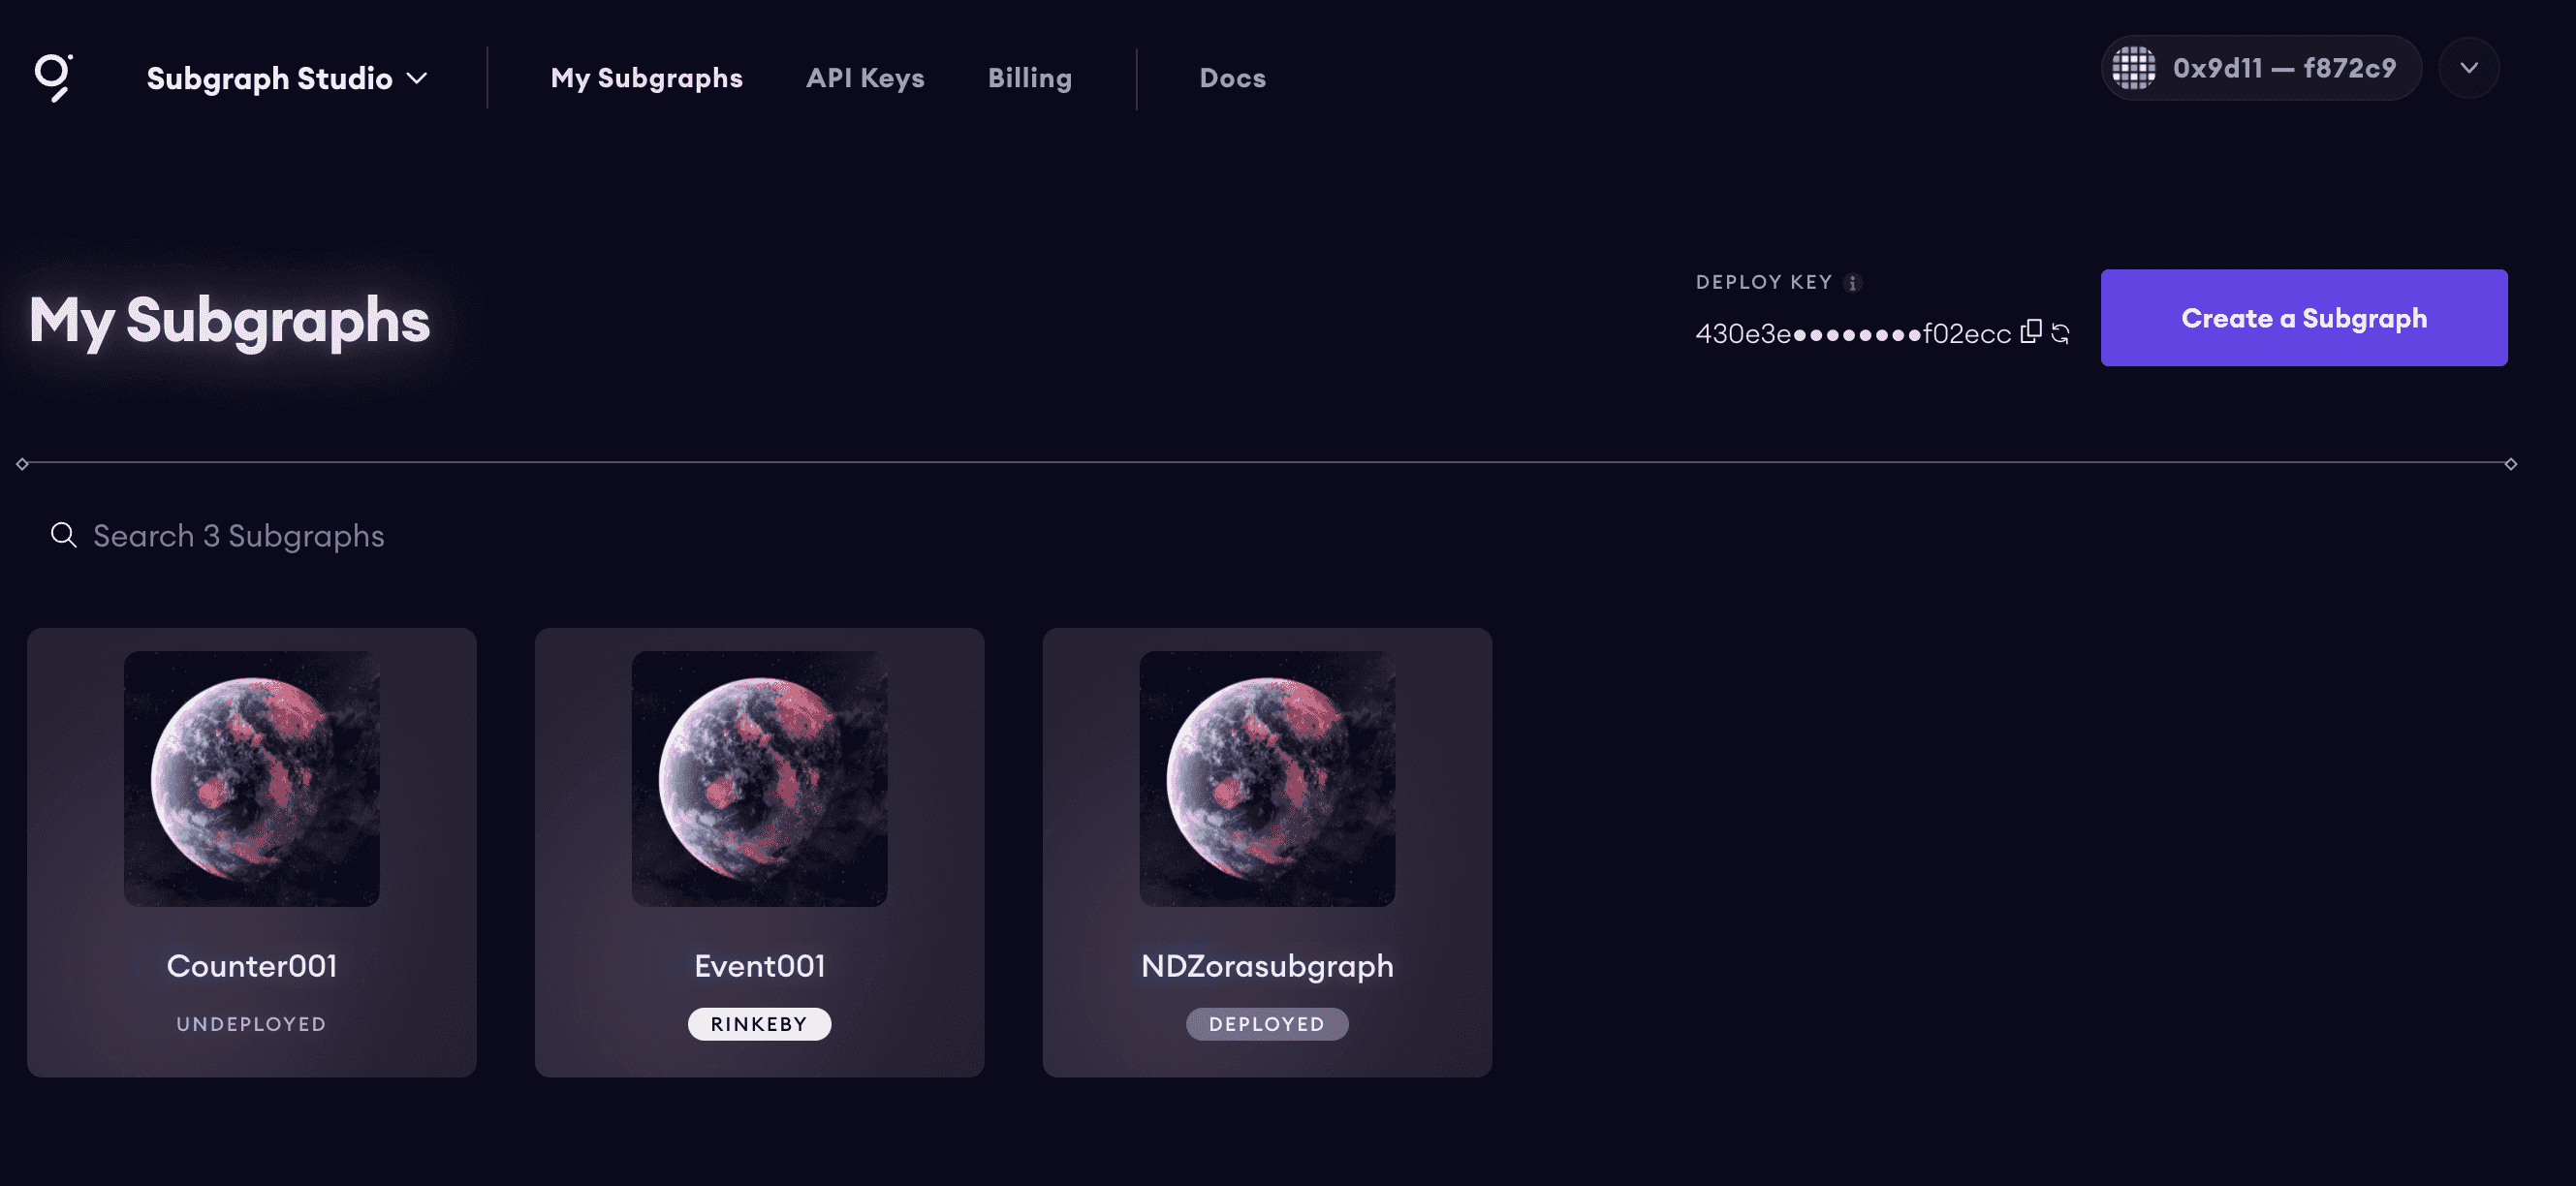
Subgraph Studio で Subgraph 作成
Subgraph Studio で Subgraph を作って、Deploy Key を用意します。 https://thegraph.com/studio/subgraph/
[Create a Subgraph]をクリックします。
- [Ethereum Rinkeby]を選択
- [任意の Subgraph 名]を入力
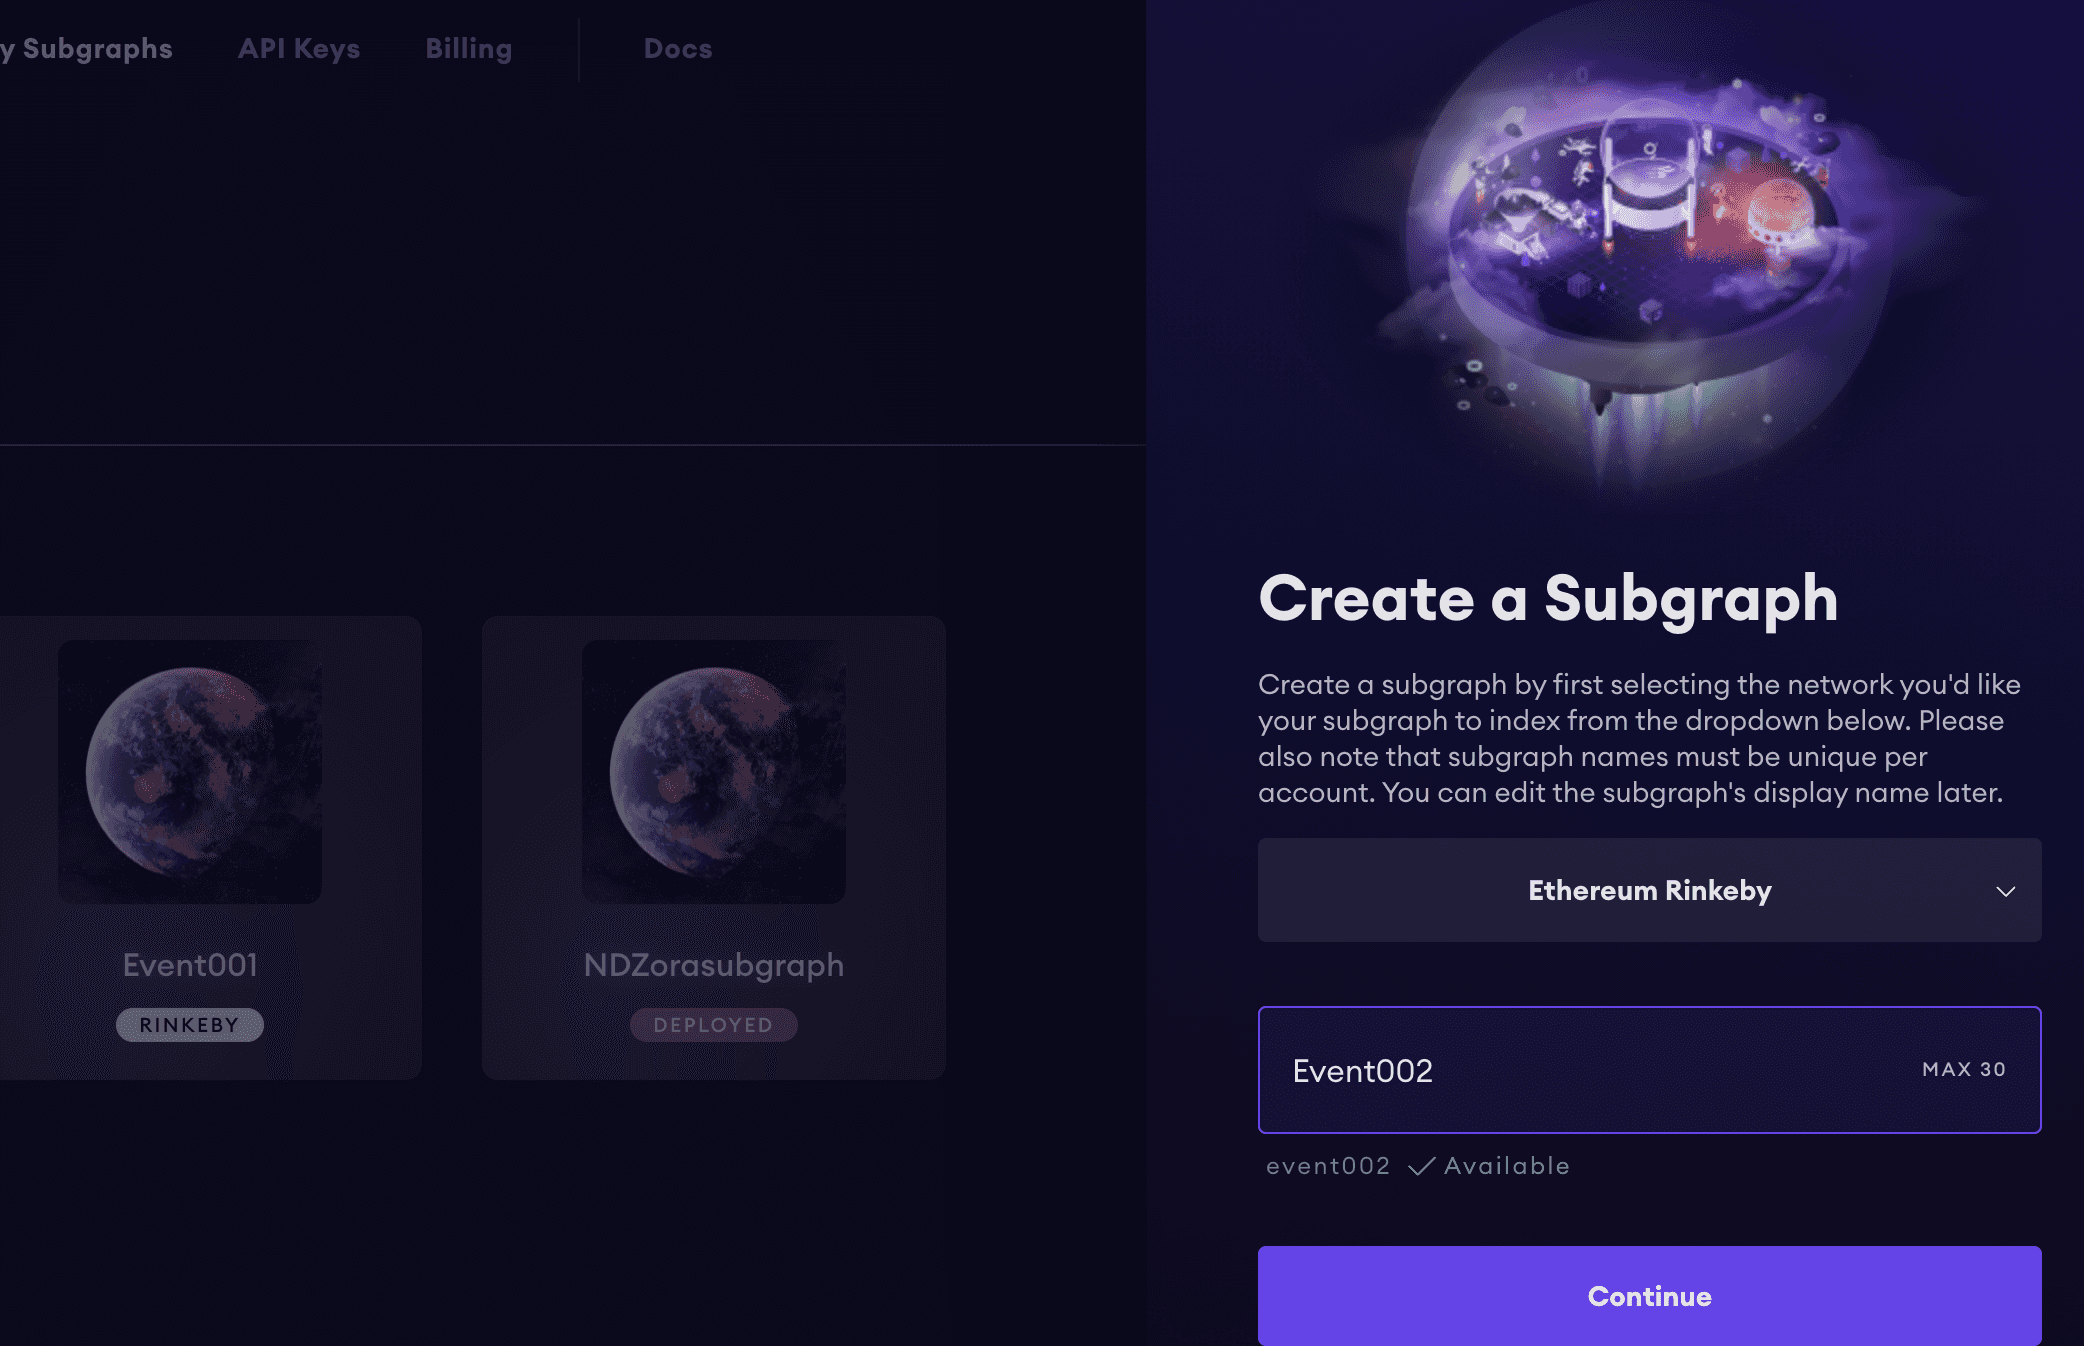
これでデプロイの準備ができました。
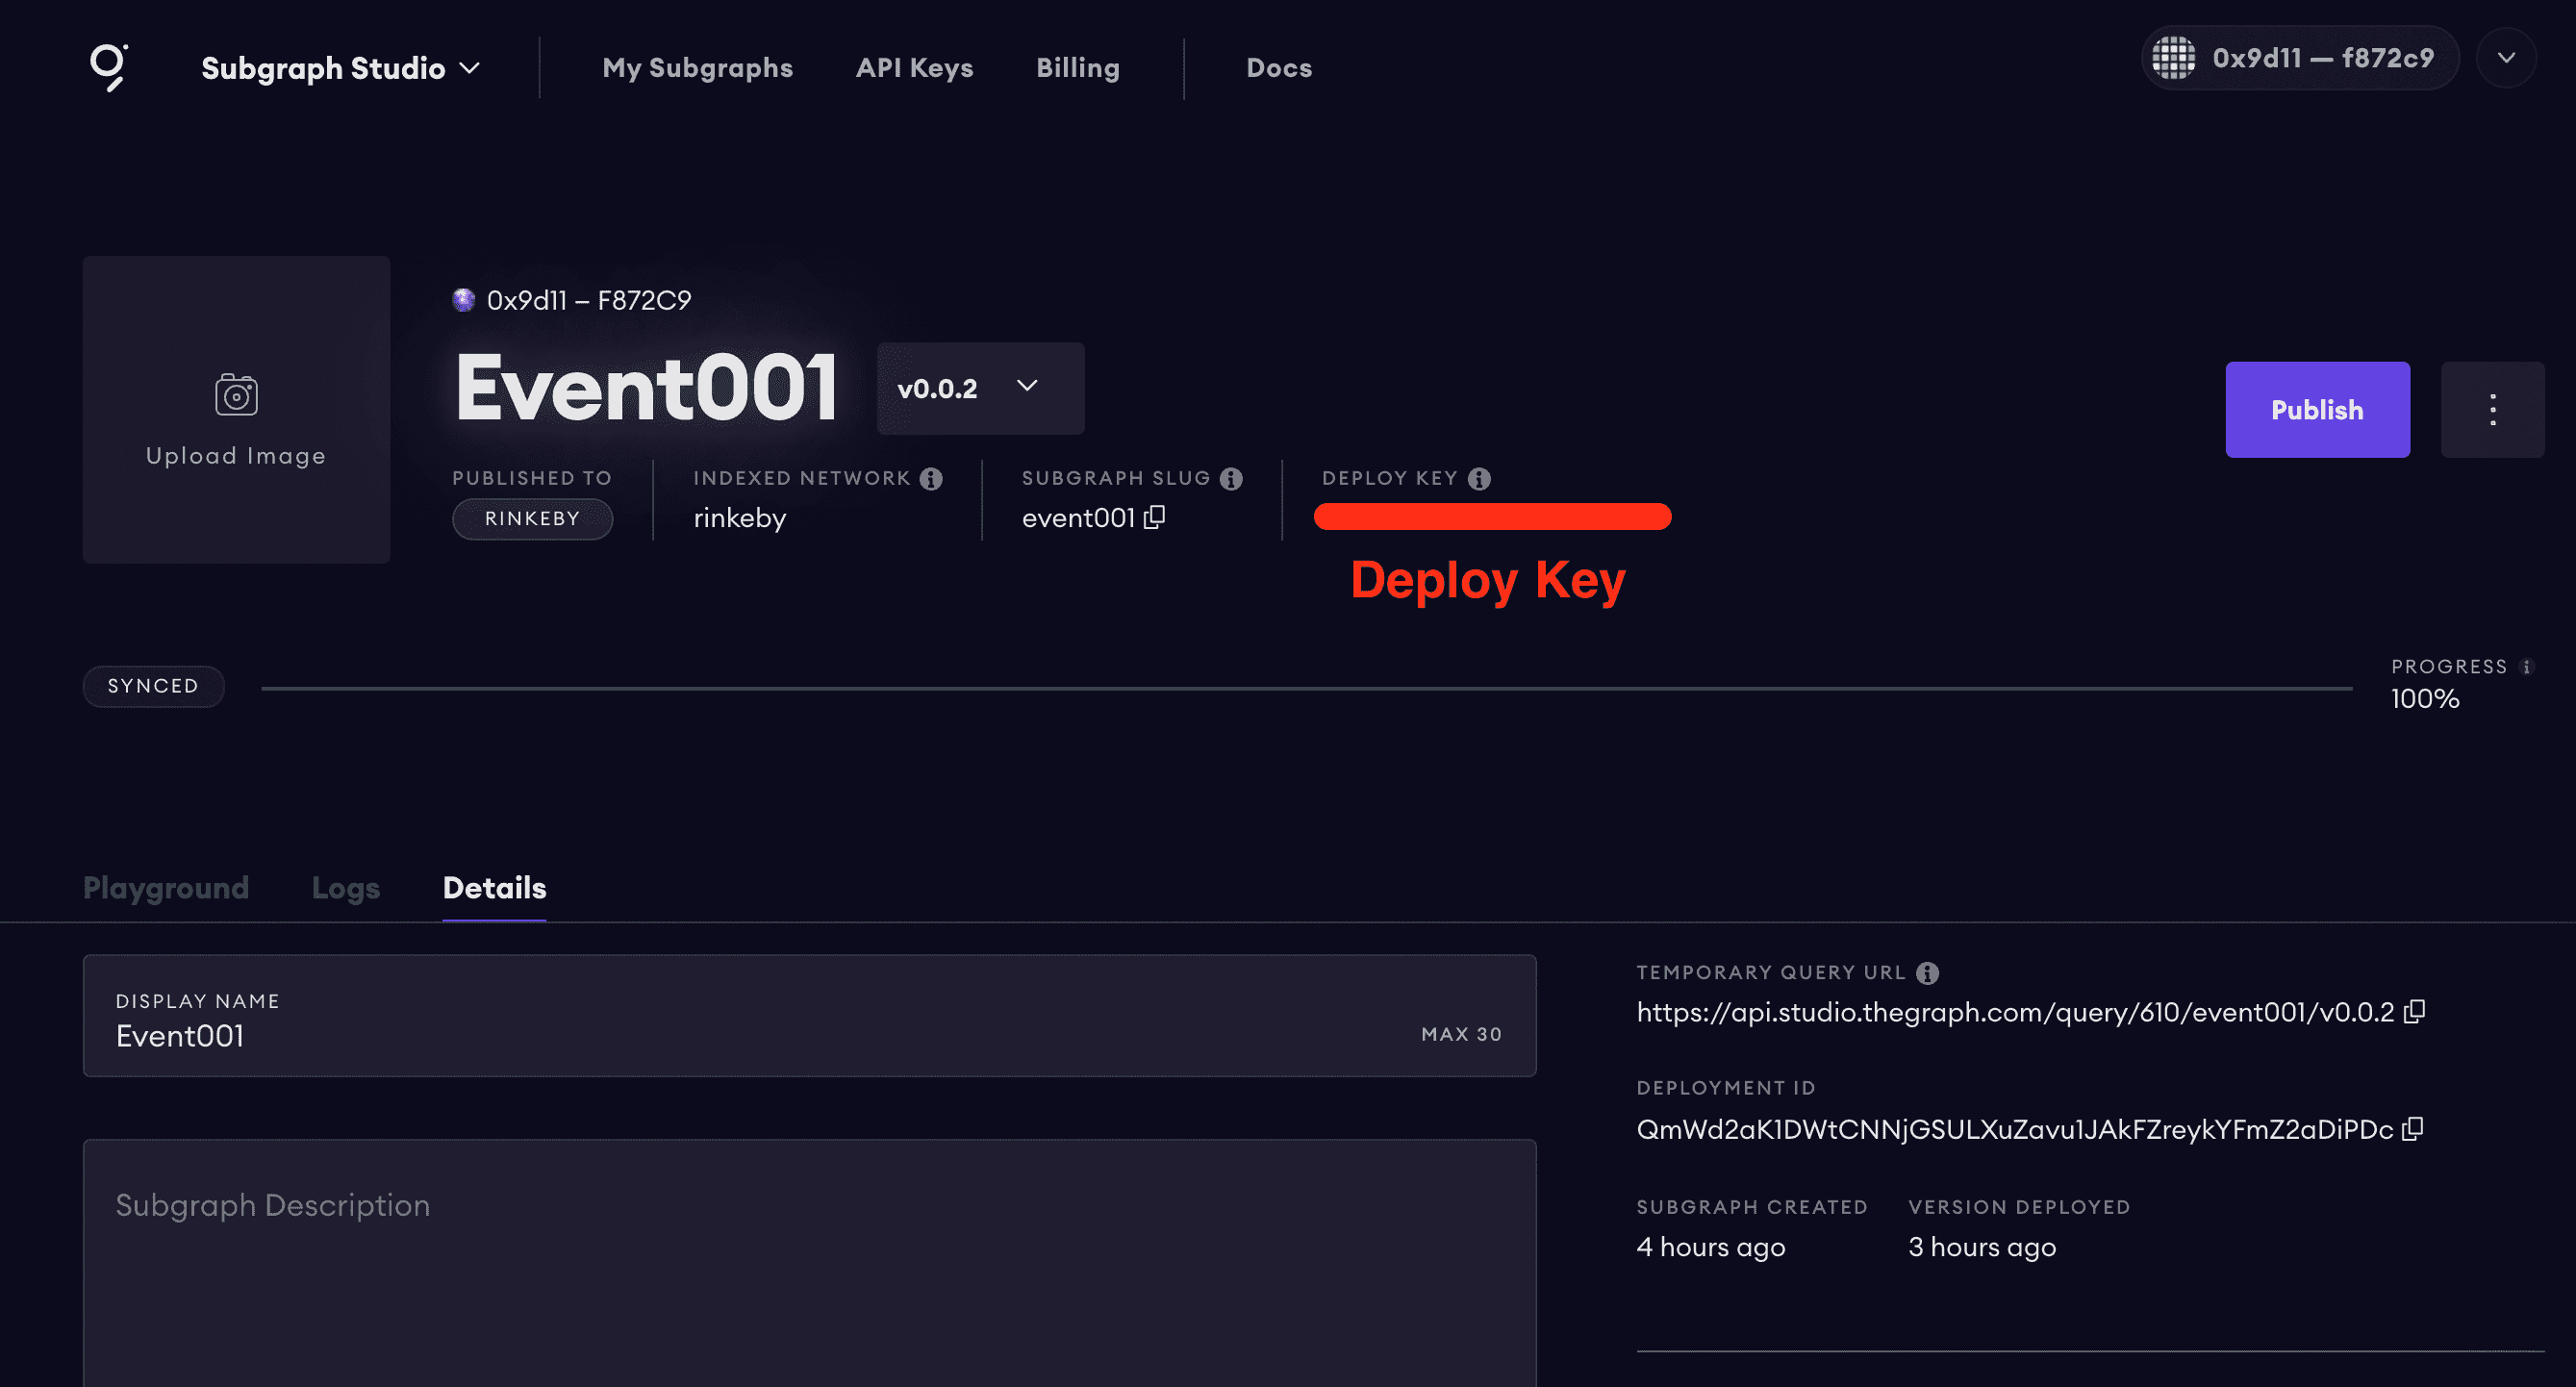
ローカルの graph コマンドの認証
以下のコマンドでローカルの graph コマンドを認証します
graph auth --studio <Deploy Key>
デプロイ
以下のコマンドを実行するとデプロイします。
graph deploy --studio event001Version Label を効かれるのでv0.0.1を入力します。
event001 % graph deploy --studio event001
✔ Version Label (e.g. v0.0.1) · v0.0.1
Skip migration: Bump mapping apiVersion from 0.0.1 to 0.0.2
Skip migration: Bump mapping apiVersion from 0.0.2 to 0.0.3
Skip migration: Bump mapping apiVersion from 0.0.3 to 0.0.4
Skip migration: Bump mapping apiVersion from 0.0.4 to 0.0.5
Skip migration: Bump mapping specVersion from 0.0.1 to 0.0.2
✔ Apply migrations
✔ Load subgraph from subgraph.yaml
Compile data source: Event => build/Event/Event.wasm
✔ Compile subgraph
Copy schema file build/schema.graphql
Write subgraph file build/Event/abis/Event.json
Write subgraph manifest build/subgraph.yaml
✔ Write compiled subgraph to build/
Add file to IPFS build/schema.graphql
.. QmfDwzvSmUKGNFcdzW1HztSZ9nWRBchUwDMxjhzsuooYeT
Add file to IPFS build/Event/abis/Event.json
.. QmUWzzjttfyk8JDNTHHq46ergQphaVBjnc3VKCVPAYV33q
Add file to IPFS build/Event/Event.wasm
.. QmcfLjHPhH14RtGuaLnUnDrEFsBU4bW9pWBSYb6jiDt8Gs
✔ Upload subgraph to IPFS

Build completed: QmWd2aK1DWtCNNjGSULXuZavu1JAkFZreykYFmZ2aDiPDc

Deployed to https://thegraph.com/studio/subgraph/event001

Subgraph endpoints:
Queries (HTTP): https://api.studio.thegraph.com/query/610/event001/v0.0.1
Subscriptions (WS): https://api.studio.thegraph.com/query/610/event001/v0.0.1
これでサブグラフをデプロイできました。
クエリ実行
デプロイしてしばらくするとサブグラフのステータスが Synced になりクエリを実行できる状態になります。
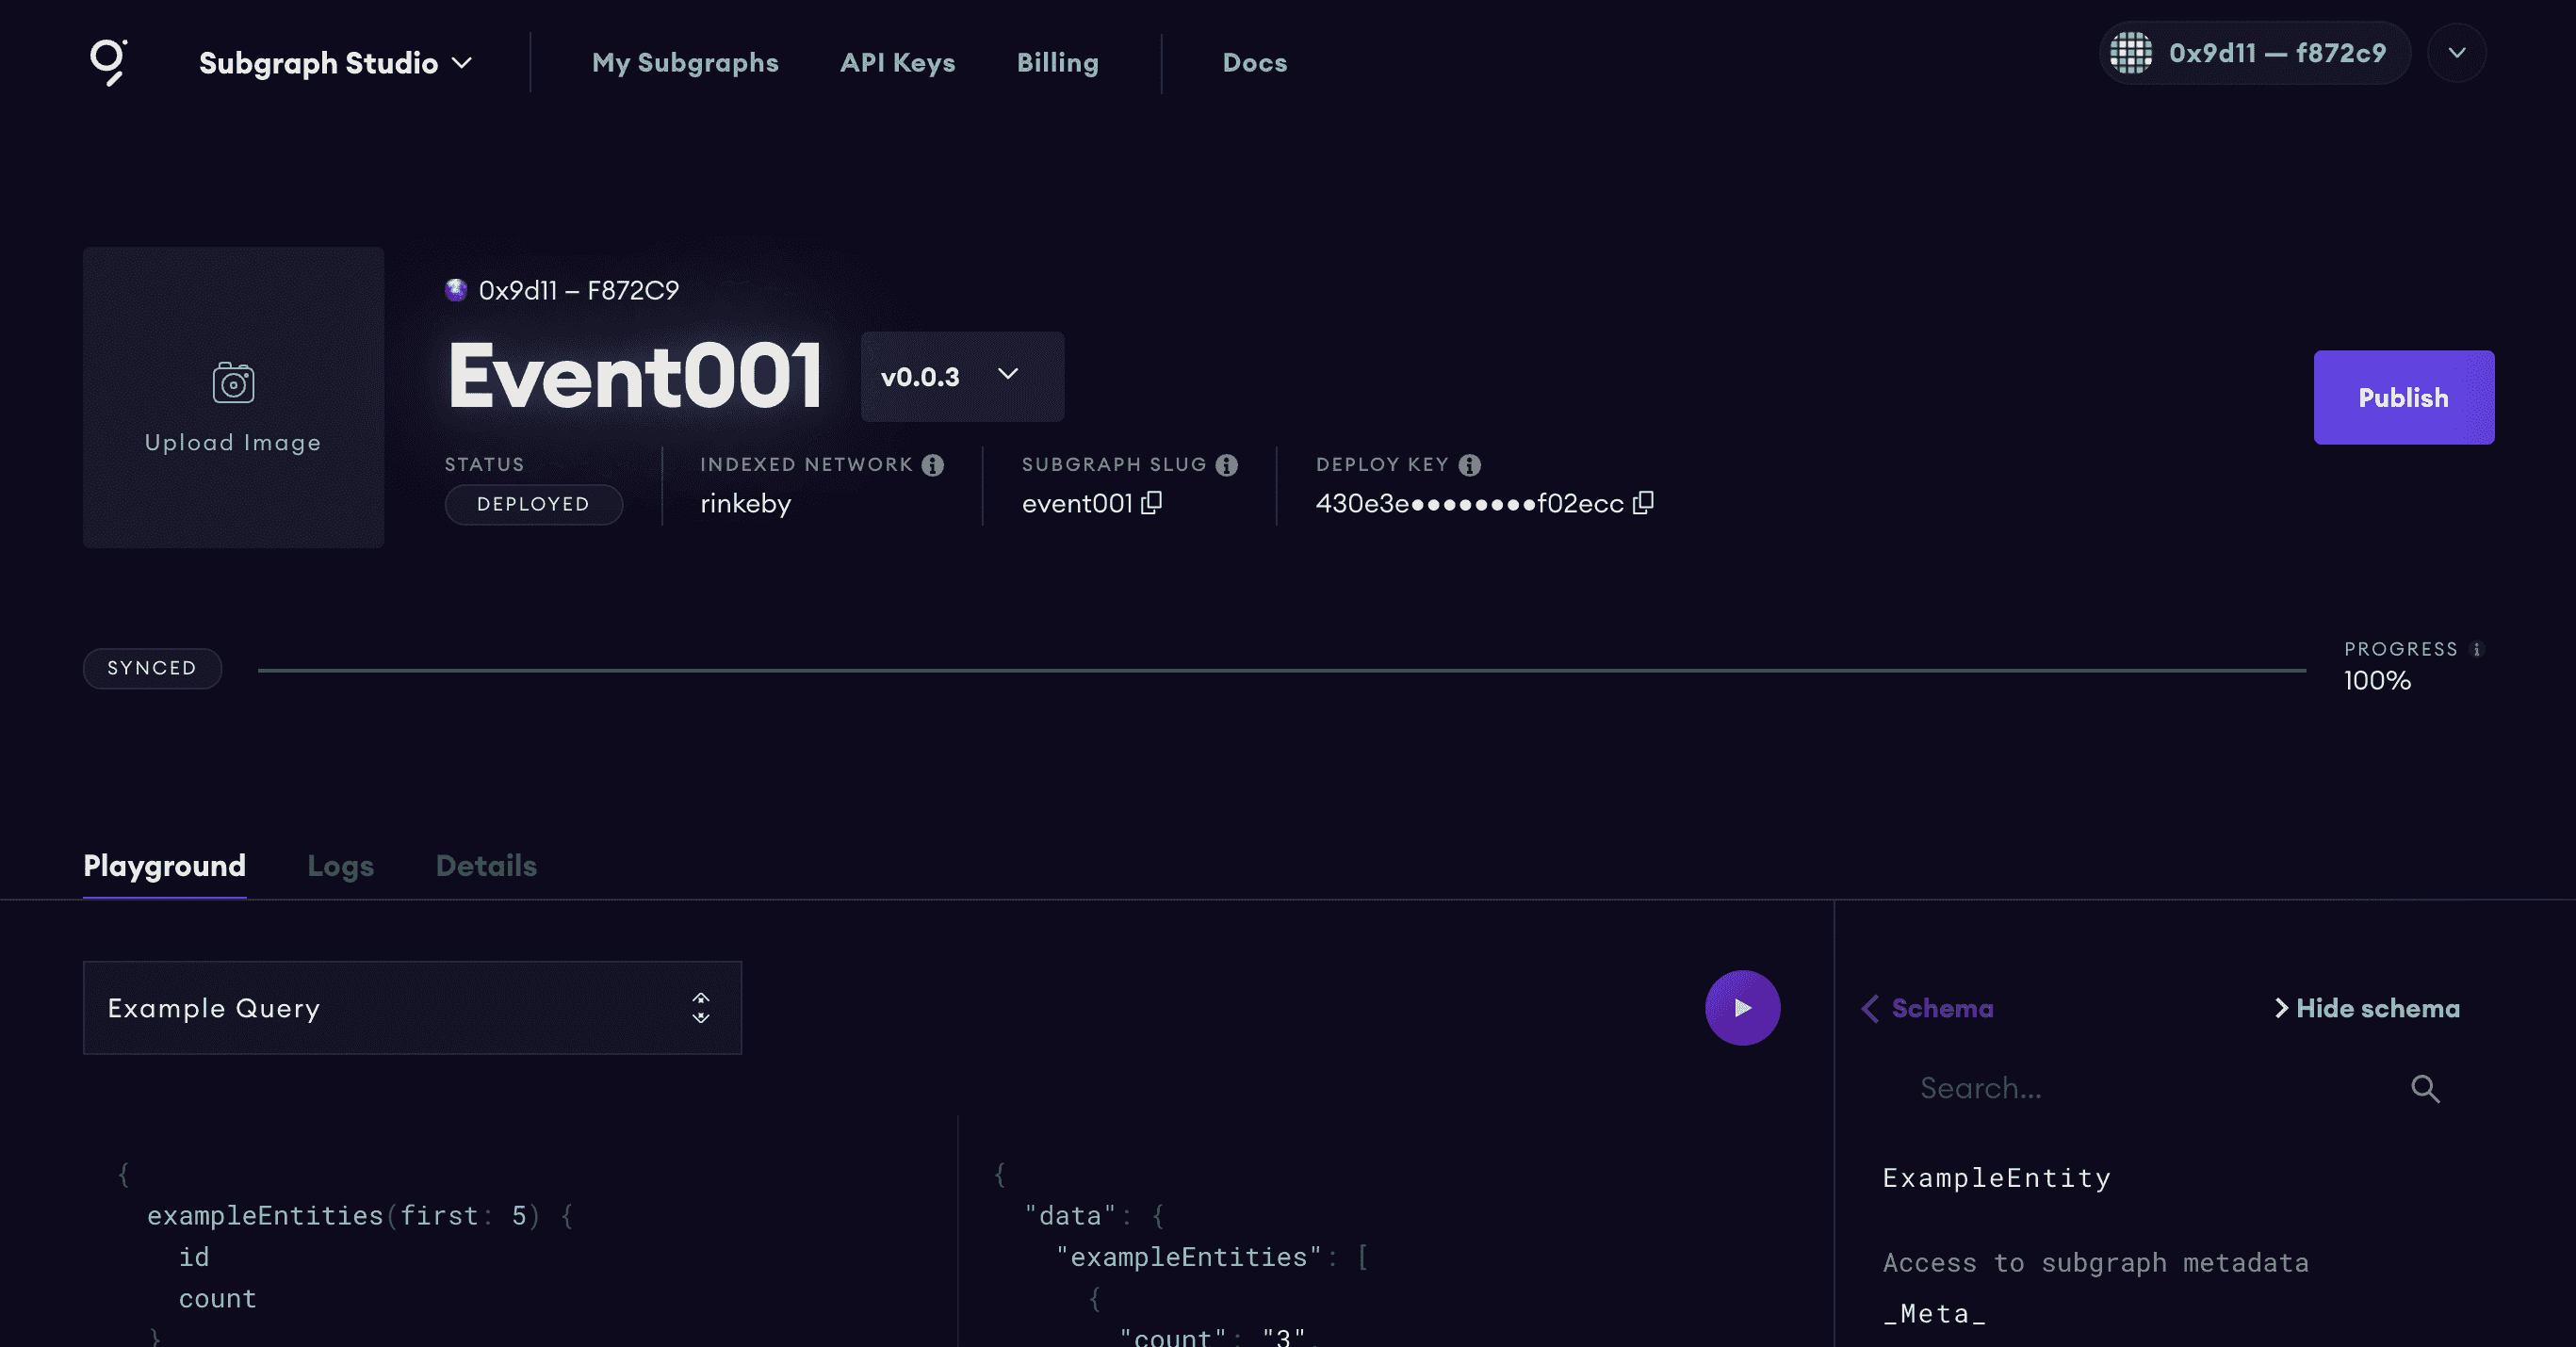
Synced になったら、Playground でクエリを実行してみましょう。
GraphQL を知らなくてもデフォルトで入力されているクエリをそのまま実行すれば結果が返ってきます。
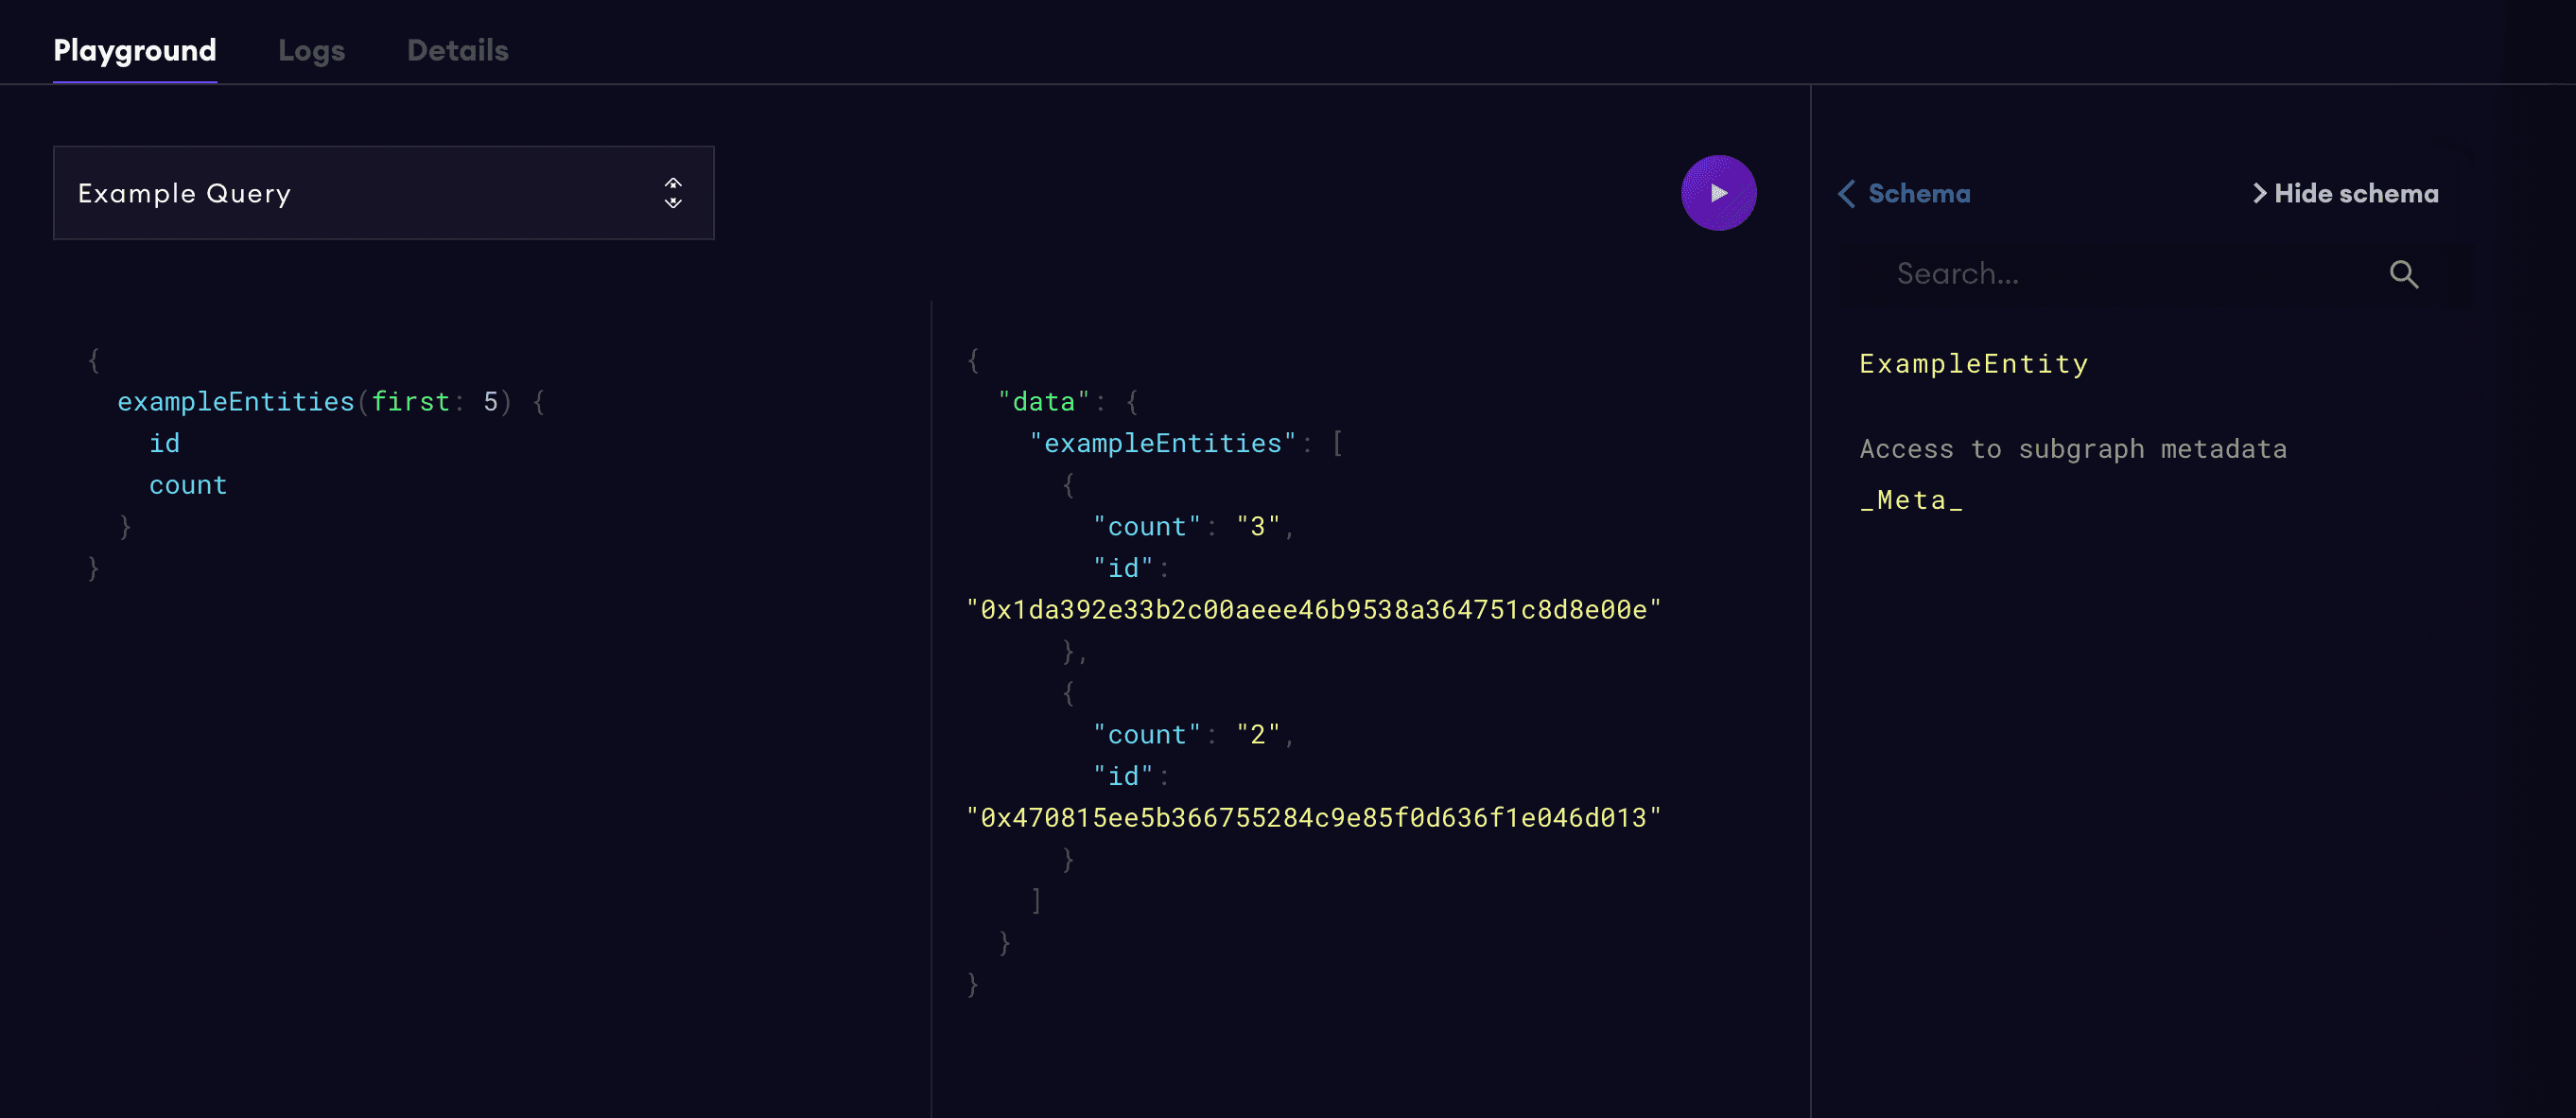
サンプルクエリ
{
  exampleEntities(first: 5) {
    id
    count
  }
}
実行結果
{
  "data": {
    "exampleEntities": [
      {
        "count": "3",
        "id": "0x1da392e33b2c00aeee46b9538a364751c8d8e00e"
      },
      {
        "count": "2",
        "id": "0x470815ee5b366755284c9e85f0d636f1e046d013"
      }
    ]
  }
}
この結果は、Event というスマートコントラクトの test()という関数を実行したアドレスと実行した回数を表しています。